

Standard Operating Procedures matter on a cycling tour because so much of what keeps people safe and the trip running well happens in the gap between “guide makes a judgment call” and “guide follows a tested process.” Heat exhaustion, a mechanical failure, a busy intersection: these go better when the response is rehearsed rather than improvised in the moment.
We have one because consistency is the actual product here. A tour’s quality shouldn’t depend on which guide happens to be leading that week, or whether a particular driver remembers to load the first aid kit. The SOP exists so that the same standard of care applies regardless of who’s running a given trip.
We’re sharing it because transparency is part of how we want to earn trust. Most operators keep this kind of document internal. We’d rather let people see exactly how a tour is supposed to run, how emergencies get handled, what staff training looks like, what’s in the medical kit, so the decision to book isn’t made on marketing alone.
And we’d genuinely like other cycling tour operators, anywhere in the world, to take this and use it. Safety procedures aren’t where we want to compete with anyone. If another operator adopts these protocols and it means fewer riders get hurt on a mountain pass somewhere, that’s a better outcome than keeping it proprietary. Consider it free to copy, adapt, and put into practice.
STANDARD OPERATING PROCEDURES
Vietnam Cycling Tours: Operations Manual
1. PRE-TOUR OPERATIONS
1.1 CLIENT ONBOARDING (T-60 to T-30 Days)
Objective: Ensure clients are properly prepared and expectations are aligned
Required Actions:
- Initial Communication Package – Send detailed itinerary with daily elevation profiles and distance breakdowns – Provide equipment checklist (see Appendix A) – Share training recommendations based on tour difficulty level – Distribute medical history questionnaire (mandatory return) – Send emergency contact form (mandatory return) – Provide insurance verification requirements – Share cultural brief (Vietnam customs, dos/don’ts) – Send packing list with climate-specific recommendations
- Medical & Fitness Screening – Review returned medical questionnaires – Flag any conditions requiring special attention (asthma, diabetes, heart conditions, allergies) – Confirm current fitness level matches tour requirements – Request doctor’s clearance for clients over 65 or with pre-existing conditions – Document all medications clients will carry – Identify dietary restrictions and allergies
Red Flags Requiring Extra Screening: – Recent surgery (< 6 months) – Cardiovascular conditions – Severe allergies (especially to insect stings) – Limited cycling experience for challenging routes – No travel insurance coverage
- Pre-Tour Briefing Call (T-14 Days) – Conduct 15-30 minute video call with each group or individual – Review itinerary and answer questions – Clarify physical requirements and daily expectations – Confirm arrival/departure logistics – Share WhatsApp group link for tour communication – Provide local emergency contact numbers – Verify visa and passport validity (6+ months)
Documentation: Store all medical forms, emergency contacts, and signed liability waivers in secure client files (digital and physical backup)
1.2 EQUIPMENT & LOGISTICS PREPARATION (T-30 to T-7 Days)
Objective: Ensure all equipment, vehicles, and routes are tour-ready
- Bicycle Fleet Inspection
For Each Bike on Tour: – Complete mechanical inspection checklist (see Appendix B) – Check frame integrity (cracks, dents, alignment) – Inspect and test brake systems (hydraulic fluid levels if applicable) – Check tire pressure and tread wear (replace if < 40% tread) – Test all gears (adjust derailleurs if needed) – Lubricate chain and inspect for wear – Check saddle and handlebar security – Test bell/horn functionality – Inspect pedals and cleats (if used) – Verify lights are charged and functional – Attach bike number tag
Spare Equipment Inventory (per 8 cyclists): – 2 complete spare bikes (correct sizes) – 4 spare inner tubes per bike size – 2 spare tires per bike size – Extra brake pads (4 sets) – Derailleur hangers (2 per bike model) – Chain links and chain tool – Spare cables (brake and gear) – Basic tools: multi-tool, tire levers, pump, patch kit – Spare pedals and cleats – First aid supplies (see Section 3.3)
- Support Vehicle Preparation
Vehicle #1: Lead Support Van – Full mechanical inspection by certified mechanic – Verify valid insurance, registration, and driver permits – Clean interior and exterior – Stock with cold water (3L per cyclist per day) – Load cooler with ice and sports drinks – Install bike rack or confirm internal bike storage capacity (minimum 4 bikes) – Verify air conditioning functionality – Test communication devices (radio, mobile phone, satellite phone if remote areas) – Load medical kit (see Section 3.3) – Load tool kit and spare parts – Install GPS tracker – Add signage: “CYCLING TOUR SUPPORT VEHICLE” in Vietnamese and English
Vehicle #2: Sweep Vehicle (for groups 10+) – Complete same checklist as Vehicle #1 – Additional focus on bike carrying capacity (minimum 6 bikes) – Load extra water and nutrition supplies – Load shade tent and folding chairs for rest stops
Vehicle Safety Equipment (both vehicles): – Fire extinguisher – First aid kit (comprehensive) – Warning triangles (2) – High-visibility vests (for all passengers) – Flashlights and extra batteries – Mobile phone car chargers – Physical maps as GPS backup
- Route Reconnaissance (T-14 to T-7 Days)
Required for All Routes: – Drive entire route in support vehicle – Document road conditions and flag hazards (potholes, construction, narrow sections) – Identify safe rest stop locations (shade, bathrooms, water) – Mark hospital/clinic locations along route – Confirm accommodation bookings and accessibility – Test mobile phone coverage (note dead zones) – Identify alternative routes for emergency detours – Take photos of tricky intersections/turns – Meet with local contacts (hotels, restaurants, guides) – Update route GPX file with current conditions
Create Route Cards (laminated, one per guide): – Daily route map with kilometer markers – Elevation profile – Rest stop locations – Hospital locations – Alternative route options – Local emergency numbers – Key phrases in Vietnamese
- Accommodation & Meal Coordination
Hotel Pre-Arrival (T-3 Days): – Confirm room bookings and special requests – Verify bike storage facilities (secure, covered) – Request ground floor or elevator access for cyclists – Confirm early breakfast availability – Share dietary restrictions with kitchen staff – Pre-arrange luggage handling procedures – Confirm early check-in/late check-out if needed
Restaurant Pre-Arrangements: – Confirm group meal reservations – Share dietary restrictions and allergy information – Pre-order set menus where appropriate (faster service) – Verify bathroom facilities are clean and accessible – Arrange for filtered water availability – Confirm payment method and gratuity policy
1.3 STAFF BRIEFING & TRAINING (T-7 Days)
Objective: Ensure all staff are aligned on procedures and client needs
- Team Roster Confirmation
Minimum Staff for Tours: – Groups 1-8: 1 lead guide + 1 driver – Groups 9-16: 2 guides + 2 drivers – Groups 17+: 3 guides + 2-3 drivers
Required Staff Qualifications: – Lead Guide: Advanced first aid certification, 100+ tour days experience – Support Guide: Basic first aid certification, 50+ tour days experience – Drivers: Valid commercial license, defensive driving training, first aid basics – All Staff: Customer service training, cultural sensitivity training, English proficiency
- Pre-Tour Staff Meeting (All Staff Present)
Meeting Agenda (90 minutes):
- Client Briefing (20 minutes)
- Review each client’s profile (name, age, experience level, medical concerns)
- Discuss group dynamics and any special needs
- Review dietary restrictions
- Identify “watch list” clients requiring extra attention
- Route Review (30 minutes)
- Walk through each day’s route on maps
- Discuss challenging sections and rest stop locations
- Review alternative routes and bailout options
- Assign roles (lead cyclist, sweep cyclist, vehicle positions)
- Discuss daily mileage and elevation goals
- Safety Protocol Review (20 minutes)
- Refresh emergency procedures (see Section 6)
- Review hand signals and communication protocols
- Discuss traffic management strategies
- Review what constitutes a “stop ride” situation
- Practice emergency response scenarios
- Cultural Experience Planning (15 minutes)
- Review cultural activities and local guide coordination
- Discuss storytelling opportunities and historical context
- Plan photography and group engagement moments
- Review tipping and local interaction protocols
- Logistics Coordination (5 minutes)
- Confirm communication devices and channels
- Verify all staff have route cards and emergency contacts
- Final equipment check assignments
Documentation: All staff sign attendance sheet confirming briefing completion
1.4 FINAL PRE-DEPARTURE CHECKS (T-1 Day)
24 Hours Before Tour Start:
Equipment Final Check – All bikes numbered and assigned to specific clients – Vehicles fueled and ready – All route cards distributed to guides – First aid kits inspected and stocked – Communication devices charged – Coolers iced and stocked with drinks – Snacks and energy bars loaded – Tool kits complete in both vehicles
Administrative Final Check – All client waivers signed and filed – Emergency contacts list printed (2 copies: lead guide + vehicle) – Hotel confirmations printed – Restaurant reservations confirmed – Weather forecast reviewed (contingency plans if needed) – Cash for incidentals distributed to lead guide – Credit cards and payment methods verified – Staff expense advance distributed
Communication Final Check – WhatsApp group created with all clients – Send “arrival tomorrow” message with meeting point details – Confirm all client flight/arrival times – Arrange airport/hotel pickup logistics – Test all staff mobile phones – Share live tracking link with operations base (if applicable)
2. DAILY TOUR OPERATIONS
2.1 MORNING ROUTINE (Tour Day Protocol)
Objective: Start each day safely, efficiently, and positively
- Staff Pre-Breakfast Meeting (6:00 AM)
Daily Huddle (15 minutes): – Review today’s route and conditions – Discuss weather and any route modifications – Check on any client health issues from previous day – Assign roles: lead guide, sweep guide, vehicle positions – Review rest stop locations and timing – Confirm lunch and accommodation arrangements – Address any overnight incidents or concerns
Weather-Related Decisions: – Light rain: Continue with rain gear protocol – Heavy rain: Delay start or modify route – Extreme heat (>35°C): Increase rest stops, earlier start time – Strong winds: Adjust route to minimize headwind exposure – Lightning: Immediate shelter protocol
- Client Breakfast & Morning Brief (7:00-8:00 AM)
Group Gathering: – Ensure all clients have eaten adequate breakfast – Check hydration (everyone drinks 500ml before departure) – Conduct brief medical check-in (“How’s everyone feeling?”) – Address any bike issues from previous day
Daily Brief (10-15 minutes): – Today’s route overview (distance, elevation, highlights) – Weather conditions and clothing recommendations – Rest stop locations and timing expectations – Special points of interest or cultural stops – Safety reminders specific to today’s route – Group riding rules reinforcement – Questions and concerns
Key Message: “Today we ride [X km] with [Y meters] of climbing. We’ll stop every [Z km] for water and rest. Let’s stay together, communicate, and have a great day!”
- Bike Distribution & Equipment Check (8:00-8:30 AM)
For Each Cyclist: – Confirm correct bike assignment (by number) – Adjust saddle height if needed (mark preferred position) – Test brakes with cyclist watching – Quick gear function test – Check tire pressure (inflate if needed) – Verify cyclist has water bottles filled (minimum 2 bottles) – Confirm cyclist has personal items (sunscreen, phone, money) – Check cyclist wearing helmet correctly – Verify cyclist has route map or GPS device (if self-navigating sections)
Support Vehicle Loading: – All luggage loaded and secured – Spare bikes loaded – Water and snacks easily accessible – Medical kit accessible – Tool kit accessible – Route card and emergency contacts in driver area.
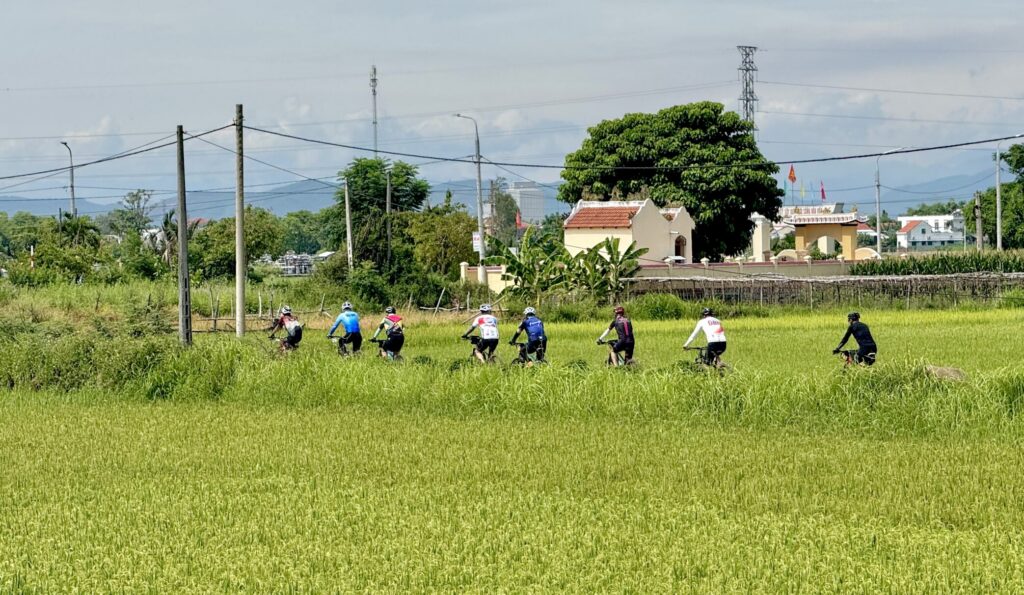
2.2 RIDING PROTOCOL (During Cycling)
Objective: Maintain group safety, cohesion, and positive experience
- Group Formation & Communication
Standard Formation:
- Lead Guide – Experienced staff member on bike, 50m ahead of group
- Sets pace
- Signals obstacles and turns
- Stops at major intersections to direct traffic
- Client Group – Riders in loose formation
- Stronger riders naturally toward front
- Less experienced riders in middle
- All riders maintain visibility of rider ahead
- Sweep Guide – Staff member on bike, behind last client
- Ensures no one left behind
- Provides mechanical assistance
- Carries basic tools and tube repair kit
- Support Vehicle – Following 100-200m behind last rider
- Hazard lights on in traffic
- Maintaining safe following distance
- Ready to assist with mechanicals or medical needs
Communication Methods:
Hand Signals (all cyclists trained on Day 1): – Left/Right turn: Arm extended in direction – Stopping: Arm raised vertically – Obstacle: Point down at obstacle – Slowing: Arm extended down, palm back, waving up/down – Single file: Arm raised, patting top of helmet – Car back: Arm pointing backward repeatedly
Verbal Calls (pass up the line): – “Car back!” – Vehicle approaching from behind – “Car up!” – Vehicle approaching from front – “Stopping!” – Lead guide slowing – “Clear!” – Intersection is safe to cross – “Slowing!” – Pace reduction ahead
Radio Communication (staff only): – Lead guide ↔ Sweep guide: Every 30 minutes check-in – Lead guide ↔ Support vehicle: Coordinate rest stops, issues – Emergency frequency monitored continuously
- Pace Management
Target Average Speed: – Flat terrain: 15-20 km/h – Rolling hills: 12-18 km/h – Mountain climbing: 8-12 km/h – Technical descents: 20-30 km/h (controlled)
Group Cohesion Rules: – Lead guide never drops group (adjusts pace to slowest) – Maximum gap between first and last rider: 500m (ideally 200m) – Re-group every 10-15 km at safe locations – Sweep guide calls ahead if gap exceeds limits – Support vehicle provides leapfrog support for struggling riders
“No Drop” Policy: – We ride as a group, finishing together – Faster riders volunteer to rotate to back – Slower riders get encouragement, not pressure – Support vehicle offers rest breaks or vehicle transport, and riders are encouraged to use either without hesitation – Adjust daily distance if needed to keep group together
- Traffic Navigation & Safety
Urban Riding Protocol: – Single file through busy streets – Obey all traffic signals (Vietnam traffic laws) – Stop at red lights as a group – Lead guide blocks intersection if needed for group safety – High-visibility vests worn in cities – Helmet lights on in low-light conditions
Rural Riding Protocol: – Double file when safe (better socializing) – Return to single file when vehicles approach – Use full lane when road shoulder unsafe – Watch for livestock, pedestrians, motorbikes – Extra caution on blind corners (sound horn)
Challenging Sections:
Busy Intersections: – Lead guide stops and directs group through – Support vehicle creates traffic break if needed – Group crosses together when clear – Sweep confirms all riders through safely
Narrow Roads/Tunnels: – Single file, activated lights – Support vehicle provides rear safety buffer – Lead guide uses hand signals for oncoming traffic – Maintain tight formation
Steep Descents: – Brief riders on proper braking technique before descent – Spread group out (3-5 second gaps) – Sweep guide monitors brake overheating – Support vehicle stays well back to avoid distraction – Regroup at bottom
- Rest Stop Protocol (Every 20-30 km or 90 minutes)
Support Vehicle Pre-Positioning: – Vehicle arrives 10 minutes before group – Parks in shaded area off main road – Sets up water station (cups, cooler) – Lays out snacks (fruit, energy bars, cookies) – Confirms bathroom locations and guides clients – Prepares any needed bike repairs
Rest Stop Routine (15-20 minutes): – All riders hydrate (minimum 250ml) – Snacks distributed and encouraged – Quick bike checks (tires, gears, brakes) – Sunscreen reapplication reminder – Medical check-in (“Everyone okay? Any discomfort?”) – Brief on next section (distance, terrain, highlights) – Group photo opportunities at scenic stops
Signs of Distress to Watch For: – Excessive sweating or lack of sweating – Confusion or disorientation – Unusual fatigue or weakness – Cramping – Complaints of nausea or dizziness – Reluctance to continue
Action: Guide takes individual aside for private check-in, considers vehicle transport
2.3 LUNCH & MIDDAY BREAK
Objective: Provide adequate rest, nutrition, and cultural experience
- Lunch Location Selection
Ideal Lunch Stop Characteristics: – Shaded seating area – Clean bathroom facilities – Quick service (pre-ordered when possible) – Interesting local restaurant (cultural experience) – Safe bike parking visible from seating – Located at 50-60% of daily distance
- Lunch Service Protocol
Upon Arrival: – Secure bike parking area – Guide group to clean hands/bathrooms – Order drinks immediately (hydration priority) – Distribute menus or explain set menu – Take orders efficiently (pre-ordered ideal) – Facilitate cultural explanations of dishes
During Meal (45-60 minutes): – Encourage adequate food intake – Facilitate conversation and bonding – Share cultural insights about food/location – Allow relaxation time (not rushed) – Check bikes remain secure – Address any morning issues or concerns
Before Departure: – Ensure payment handled smoothly – Confirm all personal items collected – Brief on afternoon route – Allow final bathroom break – Check energy levels for afternoon riding
2.4 AFTERNOON RIDING & ARRIVAL
Objective: Safely complete daily distance and arrive energized
- Afternoon Pace Adjustment
Common Afternoon Challenges: – Fatigue accumulation (monitor closely) – Post-lunch energy dip (expect slower 30 minutes) – Heat peaks (typically 2-4 PM) – Reduced concentration (increase safety vigilance)
Mitigation Strategies: – Shorter gaps between rest stops (every 15-20 km vs. 20-30 km) – Slower overall pace – More frequent check-ins via sweep guide – Offer vehicle transport earlier for struggling riders – Consider route shortcuts if group fatigue high
- Arrival at Accommodation (Target: 3:00-5:00 PM)
Arrival Sequence:
- Lead guide arrives first (3-4 PM)
- Checks in with hotel staff
- Confirms rooms ready
- Identifies bike storage location
- Coordinates luggage delivery
- Group arrives (3:30-4:30 PM)
- Bikes secured in designated area
- Room keys distributed
- Luggage matched to rooms
- Evening briefing time announced
- Free time begins
- Support vehicle arrives (if separate)
- Bikes unloaded
- Equipment secured
- Tomorrow’s supplies checked
Post-Arrival Staff Tasks: – Inspect all bikes (identify needed repairs) – Perform any mechanical work needed – Prepare bikes for next day – Confirm tomorrow’s route details – Coordinate dinner reservations – Allow clients 2-3 hours rest/exploration
2.5 EVENING PROTOCOL
Objective: Facilitate recovery, group bonding, and next-day preparation
- Evening Group Briefing (6:00 PM, 15 minutes)
Briefing Content: – Recap today’s achievements (distance, highlights) – Tomorrow’s route overview (distance, elevation, challenges) – Wake-up time and breakfast schedule – Departure time (bags outside room time) – Weather forecast for tomorrow – Optional evening activities (massage, local walks) – Q&A and address any concerns
- Group Dinner (7:00-8:30 PM)
Dinner Objectives: – Ensure adequate nutrition for recovery – Facilitate group bonding and storytelling – Share cultural insights about location/food – Create enjoyable, relaxed atmosphere
Guide Responsibilities: – Facilitate conversation and inclusion – Share local history and cultural context – Translate menu items and recommend dishes – Handle payment efficiently – Manage alcohol consumption (moderation guidance) – Note anyone not eating well (fatigue indicator)
- Evening Bike Maintenance (8:00-9:00 PM)
Nightly Bike Check: – Inspect all bikes for issues – Clean chains if dusty/dirty conditions – Re-lubricate chains – Check tire pressure – Adjust any loose components – Prepare bikes for morning (ready to ride) – Flag any bikes needing major repair
Tool Kit Inventory: – Restock used spare parts – Confirm all tools present – Prepare for next day’s potential mechanicals
- Staff Debrief (9:00 PM, 15 minutes)
Daily Staff Check-In: – What went well today? – What could be improved? – Any client concerns for tomorrow? – Any equipment issues? – Route modifications needed? – Team morale check
Documentation: – Update daily log (see Section 7) – Photo/video captured for marketing (with permission) – Incident report if anything occurred – Tomorrow’s briefing prepared
3. SAFETY & RISK MANAGEMENT
3.1 RISK ASSESSMENT & MITIGATION
Objective: Identify, assess, and mitigate cycling tour risks
- Pre-Tour Risk Assessment
Categories of Risk:
- Traffic-Related Risks
- Risk: Collision with motor vehicles
- Likelihood: Medium
- Severity: High
- Mitigation: Route selection prioritizing quiet roads; support vehicle providing traffic buffer; high-visibility clothing mandatory; traffic management at intersections; defensive riding training on Day 1
- Weather-Related Risks
- Risk: Heat exhaustion, dehydration
- Likelihood: Medium-High (tropical climate)
- Severity: Medium
- Mitigation: Mandatory hydration (3L+ per day); frequent rest stops in shade; early start times in hot season; ice water availability; staff trained to recognize heat illness
- Risk: Rain making roads slippery
- Likelihood: Medium (seasonal)
- Severity: Medium
- Mitigation: Weather monitoring and route adjustments; rain gear provided; reduced pace on wet roads; avoid metal surfaces when wet; alternative indoor activities available
- Medical-Related Risks
- Risk: Pre-existing condition flare-up
- Likelihood: Low-Medium
- Severity: High
- Mitigation: Comprehensive medical screening; client medication carried; staff aware of conditions; hospital locations mapped; emergency evacuation plan
- Risk: Overexertion, exhaustion
- Likelihood: Medium
- Severity: Low-Medium
- Mitigation: Fitness screening pre-tour; flexible daily distances; vehicle transport always available; rest days built into longer tours; a culture where taking a break carries no penalty or judgment
- Mechanical-Related Risks
- Risk: Bike failure causing accident
- Likelihood: Low (with proper maintenance)
- Severity: Medium
- Mitigation: Rigorous pre-tour bike inspections; quality equipment maintained to standards; spare bikes always available; sweep guide with repair skills; support vehicle with comprehensive toolkit
- Route-Related Risks
- Risk: Getting lost, separated from group
- Likelihood: Low (with proper guiding)
- Severity: Low-Medium
- Mitigation: Clear guiding and sweep protocols; GPS devices or detailed maps; mobile phone coverage checked; WhatsApp group for communication; regular group regrouping
- Daily Risk Assessment
Morning Risk Check (part of staff huddle): – Check weather forecast – any concerns? – Review route for new hazards (construction, events) – Assess group energy and health – Evaluate road conditions (wet, dusty, damaged) – Identify high-risk sections of today’s route – Adjust plan if risk elevated
Dynamic Risk Assessment (continuous during ride): – Staff continuously evaluate changing conditions – Authority to stop ride if risks become unacceptable – Sweep guide provides rear situational awareness – Support vehicle monitors traffic and hazards – Lead guide adapts pace and routing in real-time
3.2 SAFETY EQUIPMENT & REQUIREMENTS
Objective: Ensure all participants have proper safety equipment
- Mandatory Equipment (All Cyclists)
Personal Safety Gear: – Helmet (properly fitted, no cracks) – High-visibility vest or bright clothing – Sunglasses (eye protection from sun, insects, dust) – Sunscreen (SPF 30+ minimum) – Cycling gloves (hand protection, grip)
Bike Safety Equipment: – Working front white light – Working rear red light – Bell or horn (Vietnamese law requirement) – Reflectors (front, rear, pedals, wheels)
Personal Items: – Water bottles (2 minimum, filled) – Mobile phone (charged, with local SIM if possible) – Small amount of cash – ID and insurance card copy
Optional but Recommended: – Cycling shorts (padded chamois) – Moisture-wicking clothing – Arm/leg sun sleeves – Buff or bandana (dust protection)
- Group Safety Equipment (Staff Carries)
Lead Guide Carries: – Radio or mobile phone (primary communication) – Route card (laminated) – Emergency contact list – Basic first aid kit (cuts, scrapes) – Multi-tool – Spare tube and tire levers – Pump – Cash for emergencies
Sweep Guide Carries: – Radio or mobile phone – Basic first aid kit – Comprehensive tool kit – Spare tubes (2) – Tire levers – Pump – Chain tool and spare links – Spare brake cable – Spare gear cable
Support Vehicle Contains: – Comprehensive first aid kit (see 3.3) – Fire extinguisher – Warning triangles – Spare bikes (2 minimum) – Complete tool kit – Spare parts inventory – Emergency contact information – Hospital location map – Ice and cooler – Shade tent – Folding chairs
3.3 FIRST AID & MEDICAL PREPAREDNESS
Objective: Provide immediate medical response capability
- Staff Medical Training Requirements
Minimum Certification: – Lead guide: Advanced Wilderness First Aid (40+ hours) or EMT certification – Support guide: Basic First Aid & CPR certification (16+ hours) – Drivers: Basic First Aid certification (8+ hours)
Annual Refresher: All staff complete first aid refresher annually
Scenario Training: Staff practice response to: – Heat exhaustion and heat stroke – Road rash and lacerations – Fractures and suspected spinal injury – Anaphylactic shock (allergic reactions) – Heart attack symptoms – Severe dehydration – Head injury and concussion – Snake or insect bites
- Comprehensive First Aid Kit (Support Vehicle)
Required Contents:
Wound Care: – Sterile gauze pads (multiple sizes) – Adhesive bandages (variety of sizes) – Butterfly closures – Non-stick dressings – Medical tape (cloth and waterproof) – Elastic bandages (ACE wraps) – Triangular bandages – Rolled gauze – Antiseptic wipes – Antibiotic ointment – Hydrogen peroxide or saline solution – Disposable gloves (multiple pairs) – Scissors (trauma shears) – Tweezers – Safety pins
Medications (with usage log): – Pain relievers: Ibuprofen, Acetaminophen – Anti-diarrheal: Loperamide – Antihistamines: Diphenhydramine (Benadryl) – Antacids – Oral rehydration salts – Anti-nausea medication – Aspirin (for cardiac events) – Epinephrine auto-injector (EpiPen) – if any clients have severe allergies – Hydrocortisone cream – Antibiotic cream – Eye drops (saline)
Equipment: – Digital thermometer – Blood pressure cuff (if staff trained) – Pulse oximeter – Glucose tablets (for diabetics) – Instant cold packs – Emergency blanket – SAM splint (malleable splint) – Cervical collar (if staff trained) – CPR face shield – Eye wash kit – Tick removal tool – Snakebite kit (if in snake-prone areas)
Documentation: – First aid log book – Incident report forms – Client medical information sheets – Emergency contact cards
Storage: – Organized in clearly labeled kit (waterproof container) – Easily accessible from support vehicle – Inventory checked weekly – Expired items replaced immediately
- Medical Emergency Contact Network
Pre-Tour Preparation: – Map all hospitals and clinics along route – Note emergency room vs. clinic capabilities – Record phone numbers for each facility – Identify English-speaking doctors where possible – Understand local ambulance/emergency response (Vietnam: 115) – Share network with all staff
Hospital Information Card (one per day): – Name of nearest hospital – Address in Vietnamese and English – Phone number – GPS coordinates – Estimated drive time from key points on route – Specialties available – English-speaking staff (Y/N)
3.4 ACCIDENT PREVENTION PROTOCOLS
Objective: Minimize accident probability through proactive measures
- Pre-Ride Safety Brief (Day 1, detailed; daily thereafter, refresher)
Day 1 Comprehensive Safety Training (45 minutes):
- Helmet Fitting & Usage (5 min)
- Proper fit: 2 fingers above eyebrows
- Straps form “V” under ears
- Chin strap snug (2 finger gap)
- Helmet level (not tilted back)
- Everyone checks neighbor’s helmet
- Hand Signals & Communication (10 min)
- Demonstrate each hand signal
- Practice as a group
- Explain verbal calls
- Practice passing calls up the line
- Emphasize constant communication
- Group Riding Etiquette (10 min)
- Maintain safe following distance (2-3 bike lengths)
- No sudden movements
- Announce passes (“On your left”)
- Single file vs. double file rules
- How to signal slowing/stopping
- Draft responsibly (not too close)
- Traffic Navigation (10 min)
- Vietnam traffic norms (different from home!)
- Expect motorbikes everywhere
- Right side riding (Vietnam drives on right)
- Intersection protocols
- Role of lead guide at crossings
- When to take the lane vs. shoulder
- Descending Safely (5 min)
- Brake with both brakes (rear more than front)
- Feather brakes (don’t overheat)
- Stay relaxed (death grip tires you out)
- Look ahead, not at wheel
- Give space between riders
- What to Do If… (5 min)
- You have a mechanical: Stop safely, signal sweep guide
- You’re struggling: tell the sweep guide or take the vehicle, no questions asked
- You’re separated: Stop safely, wait for sweep or call
- You feel unwell: Speak up immediately
- Emergency: Stop, call for help, follow staff instructions
Daily Safety Reminder (5 minutes): – Today’s specific hazards (steep descent, busy town, etc.) – Hand signal refresher – Communication check (radios, phones) – “Questions? Concerns? Let’s have a great, safe day!”
- Dangerous Situation Protocols
Protocol: Approaching Busy Intersection 1. Lead guide arrives first, stops, assesses traffic 2. If safe: Lead guide signals “Clear” and proceeds, group follows together 3. If unsafe: Lead guide stops group, may manually direct traffic or wait for light 4. Support vehicle may create traffic break from behind if needed 5. All riders cross together before vehicle crosses 6. Sweep guide confirms all through safely
Protocol: Steep or Technical Descent 1. Lead guide stops group at top, briefs on descent 2. Reminds safe descending technique 3. Riders spread out (3-5 second gaps, not bunched) 4. Lead guide descends first at moderate pace 5. Sweep guide monitors from rear 6. Support vehicle stays well back 7. Regroup at bottom, check brakes
Protocol: Narrow Road or Tunnel 1. Lead guide signals “single file” 2. Group tightens to single file, activates lights 3. Lead guide may take lane to prevent passing 4. Support vehicle provides safety buffer from behind 5. All riders cautious of oncoming traffic 6. Return to normal formation when clear
Protocol: Emergency Vehicle Approaching 1. Guide calls “Pull right, emergency vehicle!” 2. All riders pull to right shoulder immediately 3. Group stops if necessary to allow passage 4. Resume only when emergency vehicle has passed
4. COMMUNICATION PROTOCOLS
4.1 CLIENT COMMUNICATION
Objective: Maintain clear, timely, and empathetic communication with clients
- Communication Channels
Primary Channel: WhatsApp Group – Created before tour starts – All clients + all staff members – Used for: Daily updates, photos, logistics, Q&A – Rules: No spam, positive tone, keep messages tour-relevant
Secondary Channel: In-Person Briefings – Morning briefing before departure – Evening briefing before dinner – Opportunity for questions and clarification
Private Channel: One-on-One Check-ins – Staff proactively checks in with individuals – Creates safe space for concerns – Used for medical issues, personal challenges, feedback
- Daily Communication Rhythm
Morning: – 6:30 AM: WhatsApp “Good morning! Breakfast at 7:00, brief at 7:45, wheels rolling at 8:30” – 7:45 AM: In-person morning briefing (see Section 2.1) – 8:15 AM: “Bikes ready for pickup, let’s gear up!”
During Ride: – Every rest stop: “Great riding! Next stop in 20km, let’s hydrate and grab a snack” – Mid-day: “Lunch in 5km at [restaurant name], looking forward to [local dish]!” – Afternoon: “Final stretch! 15km to go, you’re all doing amazing”
Evening: – Arrival: “Welcome to [city]! Rooms ready, briefing at 6 PM, dinner at 7 PM” – 6:00 PM: Evening briefing (see Section 2.5) – Post-dinner: “Great day, team! Rest well, see you at 7 AM for breakfast”
Weather/Changes: – Immediate WhatsApp if plans change – Clear explanation of reason – Alternative plan communicated – Positive framing: “Change of plans means we get to…”
- Managing Difficult Conversations
Scenario: Client Struggling/Slowing Group
Approach: 1. Private conversation (not in front of group) 2. Empathetic tone: “I noticed you seemed to be working hard today. How are you feeling?” 3. Normalize: “Plenty of people take the van for a stretch when they need to.” 4. Offer solutions: “Would you like to ride in the van for the next section and see how you feel?” 5. Positive framing: “You’ll enjoy the view from the van, and you can rejoin when you’re ready” 6. Follow-up: Check in again at lunch/evening
Scenario: Client Complaining About Pace/Route/Accommodation
Approach: 1. Listen actively without defensiveness 2. Validate feelings: “I understand your concern about…” 3. Explain context if helpful: “We chose this hotel because…” 4. Problem-solve: “Here’s what we can do…” 5. Follow-up: “Did that solution work for you?” 6. Document: Note in daily log for future improvement
Scenario: Client Injured/Unwell
Approach: 1. Immediate assessment and care (see Section 6) 2. Clear communication: “Here’s what we’re going to do…” 3. Involve client in decisions when appropriate 4. Keep group informed without over-sharing: “Tom is feeling unwell, he’s going to rest today” 5. Update client’s emergency contact if serious 6. Document thoroughly
4.2 STAFF COMMUNICATION
Objective: Ensure seamless coordination and safety among team
- Communication Devices & Check-ins
Communication Tools: – Two-way radios (encrypted channel) for real-time coordination – Mobile phones (with local SIM cards) as backup – WhatsApp staff group for non-urgent coordination – Satellite phone (if in remote areas with no coverage)
Mandatory Check-ins: – Every 30 minutes during ride: Sweep → Lead (position, status, issues) – Every hour during ride: Lead → Base (if remote/multi-day) – Before each major decision: Staff consult (route change, medical situation) – End of day: All staff debrief (see Section 2.5D)
Radio Protocol: – Clear, concise messages – Use names: “Lead guide to sweep guide” – Confirm receipt: “Copy that” – Emergency code word: “CODE RED” (immediate attention required)
- Staff Roles & Responsibilities
Lead Guide: – Overall tour safety and experience – Route navigation and pacing – Client communication and engagement – Emergency decision-making authority – Cultural interpretation and storytelling
Sweep Guide: – Ensures no riders left behind – Monitors back-of-group rider well-being – Provides mechanical assistance – Communicates group status to lead – Supports struggling riders
Support Vehicle Driver: – Safe vehicle operation – Equipment management – Rest stop setup – Communications with lead guide – Client transport when needed – Never leaves designated area without lead guide approval
Secondary Guide (on larger tours): – Floats within group providing support – Engages clients in conversation – Takes photos/videos (with permission) – Assists with mechanicals – Provides additional safety oversight
- Decision-Making Authority
- Standard Operations: Lead guide makes decisions
- Safety Emergencies: Lead guide has final authority, consults team when time allows
- Medical Emergencies: Lead guide assesses, coordinates response, may delegate tasks
- Route Changes: Lead guide decides after consulting weather/conditions/group status
- Client Issues: Lead guide handles, may involve sweep guide for support
Escalation to Base/Management: – Serious injury or medical emergency – Police involvement – Client evacuation required – Tour cancellation consideration – Major equipment failure – Natural disaster or civil unrest
4.3 EMERGENCY COMMUNICATION PLAN
Objective: Ensure rapid, clear communication during emergencies
- Emergency Contact Hierarchy
Tier 1: Immediate Response (Staff on Tour) – Lead guide coordinates response – Sweep guide assists – Driver executes logistics (driving to hospital, etc.)
Tier 2: Operations Support (Base) – Tour operations manager (24/7 emergency line) – Responsible for: Coordinating external resources, communicating with client families, insurance liaison
Tier 3: External Emergency Services – Vietnamese emergency services: 115 (ambulance), 113 (police), 114 (fire) – Local hospitals (pre-identified along route) – Embassy/consulate (for serious incidents involving foreign nationals)
Tier 4: Client Emergency Contacts – Family members (notified by operations manager, not field staff) – Travel insurance provider
- Emergency Communication Procedure
When Emergency Occurs:
- Immediate (0-5 minutes):
- Lead guide assesses situation
- Provides immediate care (first aid, safety)
- Sweep guide secures scene (stops traffic, protects client)
- Driver calls emergency services if needed (115)
- Stabilization (5-15 minutes):
- Lead guide calls operations base: “CODE RED – [brief situation]”
- Continue care while awaiting emergency services
- Document situation (photos, notes, witness statements)
- Secure client’s belongings
- Transport (15-30 minutes):
- Client transported to hospital (ambulance or support vehicle depending on severity)
- Lead guide or assigned staff accompanies client
- Remaining staff manages rest of group
- Operations base begins coordinating insurance, family notification
- Ongoing (30 minutes+):
- Staff with client stays in communication with operations base
- Group continues tour or modifies as appropriate
- Operations manager communicates with family
- Insurance claim process begins
- Incident report completed (see Section 7)
Communication Template for Operations Base: “CODE RED. This is [name]. Location: [specific location]. Situation: [brief description]. Client: [name]. Injury/Illness: [specific]. Actions taken: [what we’ve done]. Assistance needed: [what we need]. Status: [stable/unstable]. ETA hospital: [time].”
5. CULTURAL EXPERIENCE DELIVERY
5.1 CULTURAL IMMERSION STRATEGY
Objective: Provide authentic, respectful, and memorable cultural experiences
- Pre-Tour Cultural Education
Client Cultural Brief (sent pre-tour): – Vietnamese history overview (brief, accessible) – Cultural norms and etiquette – Appropriate dress guidelines – Photography etiquette – Tipping customs – Basic Vietnamese phrases – Religious customs (Buddhist temples, ancestor worship)
Key Cultural Concepts to Cover: – “Saving face” – importance of dignity, avoiding embarrassment – Respect for elders – age hierarchy in Vietnamese culture – Collectivism – community before individual – Hospitality – Vietnamese warmth and generosity – War history – sensitivity around Vietnam War topics – Resilience – Vietnamese pride in overcoming adversity
- Daily Cultural Integration
Morning Cultural Moments: – Share historical context for region visiting today – Teach Vietnamese phrase of the day – Explain local foods we’ll encounter – Highlight cultural sites on today’s route
During Ride Cultural Stops: – Local Markets: Stop to explore, explain items, facilitate respectful interaction – Pagodas/Temples: Brief on etiquette (shoes off, modest dress, photography rules), guide proper visitation – War Sites: Provide historical context, allow reflection time, facilitate respectful questions – Rice Fields/Farms: Explain agriculture, seasonal cycles, farmer life (arrange meeting if possible) – Villages: Stop in less-touristed villages, facilitate genuine (not performative) interactions
Meal Times Cultural Education: – Explain dishes and ingredients – Share table etiquette (chopstick use, communal dining) – Discuss regional food differences – Facilitate trying new foods with encouragement (not pressure)
Evening Cultural Activities: – Optional: Traditional water puppet show, cooking class, handicraft workshop – Evening story-telling: Share deeper historical context – Q&A sessions: Allow clients to ask cultural questions – Local guide interactions: Invite local experts to share perspectives
- Facilitating Respectful Local Interactions
Guide’s Role as Cultural Bridge: 1. Translate – Not just words, but cultural context 2. Facilitate – Create opportunities for genuine connection 3. Protect – Ensure interactions benefit both tourists and locals 4. Educate – Help clients understand what they’re experiencing 5. Model – Demonstrate respectful behavior
Interaction Guidelines for Clients:
DO: – Smile and make eye contact (universal friendliness) – Ask permission before photographing people – Learn and use basic Vietnamese greetings – Dress modestly in villages and religious sites – Remove shoes when entering homes and temples – Accept offers of tea or refreshments (refusal can offend) – Be patient with language barriers – Purchase from local vendors when possible – Tip appropriately (guide will advise)
DON’T: – Touch people’s heads (especially children) – sacred in Buddhist culture – Point with feet or show soles of feet – Raise voice in anger or frustration (causes loss of face) – Display excessive public affection – Enter temples/homes without permission – Photograph military or sensitive government sites – Give money directly to begging children (discuss with guide) – Make assumptions about poverty or culture – Compare Vietnam unfavorably to home country – Discuss war history insensitively
5.2 STORYTELLING & INTERPRETATION
Objective: Bring Vietnam’s history and culture alive through narrative
- Key Stories & Historical Context
Guide Training Requirement: All guides complete training on: – Vietnam’s 4,000-year history (major dynasties, Chinese rule, French colonialism) – Vietnam War from Vietnamese perspective (unification, not defeat) – Economic reforms (Đổi Mới) and transformation since 1986 – Regional differences (North vs. Central vs. South culture) – 54 ethnic minorities and their traditions – Buddhism and ancestral worship practices – Contemporary Vietnam (modern challenges and aspirations)
Storytelling Opportunities Throughout Tour:
In Hanoi: – Uncle Ho (Ho Chi Minh) – complex legacy, reverence, mausoleum significance – Hỏa Lò Prison (Hanoi Hilton) – Vietnamese and American prisoners’ experiences – Old Quarter’s 36 streets – guild system, each street’s traditional trade – French colonial architecture – colonial period, independence struggle
In Hue: – Nguyen Dynasty emperors – royal traditions, Forbidden Purple City – DMZ and 17th Parallel – division of Vietnam, reunification significance – Imperial cuisine – how royal cooking influences modern Vietnamese food
In Hoi An: – Trading port history – Japanese, Chinese, European influences – Lantern tradition – symbolism, festivals – Architecture preservation – UNESCO recognition, traditional crafts
In Ho Chi Minh City: – Saigon before and after 1975 – transformation, name change significance – Cu Chi Tunnels – Viet Cong ingenuity, tunnel system scale – Modern economic hub – entrepreneurship, Vietnam’s future
In Mekong Delta: – Floating markets – river-based economy, unique lifestyle – Rice production – Vietnam’s rice bowl, agricultural importance – Khmer influence – minority communities, cultural blending
- Creating Emotional Connection
Techniques for Memorable Storytelling:
- Humanize History – Tell stories of individuals, not just facts
- “Mr. Thanh, whose grandfather built this house in 1920…”
- “Mai, a Hmong woman we’ll meet, learned to weave at age 7…”
- Use Sensory Details – Help clients experience, not just hear
- “Notice the smell of incense? It’s always present in Vietnamese homes…”
- “Listen to the tonal language – same word, five meanings based on tone…”
- Bridge to Universal Themes – Connect Vietnamese experiences to human experiences
- “Family devotion – Vietnamese honor ancestors like we treasure photo albums…”
- “Resilience – think of hardships in your family history, now amplify…”
- Allow Silence – Not every moment needs narration
- At war memorials – let the space speak
- In temples – allow contemplation
- On scenic descents – let beauty be experienced
- Invite Questions – Create dialogue, not lecture
- “What surprises you most about what we just saw?”
- “How is this different from home?”
- “What would you like to know more about?”
5.3 SUPPORTING LOCAL COMMUNITIES
Objective: Ensure tourism benefits local communities sustainably
- Responsible Tourism Practices
Accommodation Selection: – Prioritize locally-owned hotels over international chains – Use family-run guesthouses in smaller towns – Ensure fair wages for hotel staff – Pre-arrange homestays with fair compensation
Restaurant Selection: – Feature locally-owned restaurants – Rotate among multiple vendors (spread economic benefit) – Order dishes using local ingredients – Avoid exploitative “tourist trap” establishments – Pre-arrange payment to ensure staff get tips
Shopping & Souvenirs: – Guide clients to authentic artisan workshops – Explain fair pricing (help avoid over-bargaining) – Highlight social enterprises (traditional crafts cooperatives) – Discourage purchase of wildlife products, counterfeit goods – Support women-owned businesses when possible
Local Guide Employment: – Hire local guides for cultural sites – Pay fair wages (above minimum) – Provide opportunities for English practice – Create long-term relationships (repeat business)
- Cultural Exchange Programs
Community Engagement Activities:
Cooking Class with Local Family: – Arrange with host family (fair compensation) – Small groups to avoid overwhelming hosts – Teach 2-3 authentic dishes – Eat together (relationship building) – Allow Q&A about daily life
School Visits (when appropriate): – Coordinate with principal/teachers in advance – Brief clients on respectful behavior – Facilitate English practice (beneficial to students) – Donate school supplies (coordinate with teachers) – Short visit (30-45 min) to avoid disrupting classes – Take group photo to share with school
Craft Workshop Visits: – Silk weaving, pottery, lacquerware, etc. – Arrangement with artisan (fair payment for time) – Demonstration of craft – Opportunity to try (hands-on) – Purchase encouragement (direct economic benefit) – Learn about craft’s cultural significance
Farmer Homestays: – Arrange with willing families (compensation discussed) – Help with simple farm tasks (rice planting, harvesting) – Share meal with family – Learn about agricultural life – Cultural exchange (family asks questions about tourists’ lives too) – Modest, private sleeping arrangements
- Minimizing Negative Impacts
Environmental Responsibility: – Carry trash to proper disposal (no littering) – Use refillable water bottles (reduce plastic) – Respect natural areas (stay on trails) – Support accommodations with environmental practices – Educate clients on water conservation – Leave no trace at rest stops
Cultural Sensitivity: – Dress modestly, especially in rural areas – Ask permission before photography – Avoid “poverty tourism” (don’t photograph people for shock value) – Don’t give money to children (creates begging culture) – Respect religious sites (proper behavior, donations) – Avoid loud, disruptive behavior
Economic Equity: – Pay fair prices (don’t over-bargain with small vendors) – Tip service staff directly – Support social enterprises – Hire locally whenever possible – Avoid exploitative activities (elephant rides, orphanage visits without verification)
6. EMERGENCY RESPONSE PROCEDURES
6.1 MEDICAL EMERGENCIES
Objective: Provide rapid, effective response to medical situations
- Medical Emergency Categories & Response
CATEGORY 1: MINOR INJURIES (Guide Can Manage) Examples: Scrapes, minor cuts, small bruises, blisters, minor muscle strain
Response Protocol: 1. Stop safely and assess injury 2. Clean wound with antiseptic wipes 3. Apply appropriate bandage/dressing 4. Document in first aid log 5. Monitor for signs of infection 6. Continue tour unless client requests otherwise
CATEGORY 2: MODERATE INJURIES (First Aid + Monitoring) Examples: Deep cuts requiring stitches, significant road rash, sprains, suspected minor fracture, heat exhaustion, dehydration
Response Protocol: 1. Stop group safely, secure scene 2. Assess injury using primary survey (ABC: Airway, Breathing, Circulation) 3. Provide appropriate first aid: – Deep cuts: Apply pressure, elevate, bandage, monitor for shock – Road rash: Clean thoroughly, apply antibiotic ointment, dress – Sprains: RICE (Rest, Ice, Compression, Elevation) – Heat exhaustion: Move to shade, cool down, oral rehydration 4. Decide: Can client continue or need vehicle transport? 5. If continuing, monitor closely and reassess at next stop 6. If doubt exists, transport to nearest clinic for evaluation 7. Document thoroughly in incident report
CATEGORY 3: SERIOUS INJURIES (Immediate Medical Attention) Examples: Suspected broken bones, head injury, severe bleeding, heat stroke, chest pain, severe allergic reaction, unconsciousness
IMMEDIATE ACTIONS (0-2 minutes): 1. Lead guide: Assess situation, provide immediate care 2. Sweep guide: Secure scene (stop traffic if on road, protect injured client) 3. Driver: Call 115 (ambulance) immediately, retrieve medical kit 4. Primary Survey: Check Airway, Breathing, Circulation 5. Manage Life Threats: Control severe bleeding, maintain airway, begin CPR if needed
STABILIZATION (2-10 minutes): 1. Continue care: Keep client calm, warm, comfortable 2. Gather information: What happened? Where does it hurt? Medical history? 3. Monitor vitals: Pulse, breathing rate, consciousness level 4. Prepare for transport: Clear path for ambulance, gather client belongings 5. Call operations base: “CODE RED” (see Section 4.3) 6. Don’t move client if spinal injury suspected (unless immediate danger)
TRANSPORT (10-30 minutes): 1. If ambulance arrives: Brief paramedics, provide medical history, hand over care 2. If no ambulance: Load client carefully into support vehicle, drive to nearest hospital 3. Staff accompanies: Lead guide or designated staff stays with client 4. Communication: Staff with client updates operations base every 15-30 minutes 5. Documentation: Photos of injury (with permission), witness statements, incident report
HOSPITAL (30+ minutes): 1. Staff stays with client: Provides medical history, assists with translation 2. Insurance coordination: Operations base contacts insurance provider 3. Family notification: Operations manager calls emergency contact 4. Document everything: Medical reports, receipts, treatment received 5. Follow-up care: Arrange medication, follow-up appointments, evacuation if needed 6. Group management: Remaining staff continues or modifies tour as appropriate
- Specific Medical Scenarios
Heat Stroke (Life-Threatening)
Recognition: – High body temperature (>40°C/104°F) – Hot, dry skin (or sometimes sweating) – Confusion, altered mental state – Rapid pulse – Nausea, vomiting – Loss of consciousness possible
Response: 1. Call 115 immediately 2. Move to shade/air conditioning 3. Cool rapidly: Remove excess clothing, apply ice packs to armpits, groin, neck 4. Fan aggressively 5. If conscious, sips of cool water 6. Monitor constantly until help arrives 7. DO NOT give medications 8. Prepare for potential seizures or unconsciousness
Severe Allergic Reaction (Anaphylaxis)
Recognition: – Difficulty breathing, wheezing – Swelling of face, lips, tongue – Hives or rash spreading – Nausea, vomiting – Rapid pulse – Dizziness, fainting – Sense of impending doom
Response: 1. Call 115 immediately 2. Use EpiPen if available: Inject into outer thigh (can go through clothing) 3. Lay client down, elevate legs (unless breathing difficulty, then sit upright) 4. Loosen tight clothing 5. Prepare for CPR if client loses consciousness 6. Second EpiPen dose may be given after 5-15 min if no improvement 7. Transport to hospital even if symptoms improve (can recur)
Suspected Heart Attack
Recognition: – Chest pain or pressure (may radiate to arm, jaw, back) – Shortness of breath – Sweating, nausea – Lightheadedness – Sense of dread
Response: 1. Call 115 immediately 2. Stop all activity, have client sit or lie down 3. Give aspirin (if not allergic): 300mg chewable preferred 4. Loosen tight clothing 5. Keep client calm and reassured 6. Monitor vitals constantly 7. Prepare for CPR: If client loses consciousness and stops breathing, begin CPR 8. Do not allow client to deny symptoms or refuse care (common)
Head Injury / Suspected Concussion
Recognition: – Loss of consciousness (even briefly) – Confusion, disorientation – Headache – Nausea, vomiting – Balance problems – Vision changes – Memory problems
Response: 1. Stop ride immediately 2. Assume spinal injury until proven otherwise: Stabilize head and neck 3. Monitor consciousness level closely (every 5 min) 4. Do not allow sleeping for first 2 hours 5. If severe (unconscious, vomiting, worsening symptoms): Call 115, transport to hospital 6. If mild (alert, no severe symptoms): Transport to clinic for evaluation 7. Client does not ride again today: Even mild concussions preclude cycling 8. Follow-up monitoring for 24-48 hours
6.2 MECHANICAL EMERGENCIES
Objective: Resolve bike mechanicals quickly and safely
- Common Mechanical Issues & Solutions
Flat Tire Tools Needed: Tire levers, spare tube, pump Procedure (5-10 minutes): 1. Remove wheel from bike 2. Use tire levers to remove tire from rim 3. Check inside tire for sharp objects (glass, thorns) 4. Insert new tube, slightly inflate 5. Reseat tire on rim, ensure tube not pinched 6. Inflate to proper pressure (check sidewall) 7. Reinstall wheel, check brakes and quick release 8. Test ride before rejoining group
If multiple flats or unrepairable tire: Swap to spare bike
Broken Chain Tools Needed: Chain tool, spare chain links Procedure (10-15 minutes): 1. Locate break in chain 2. Use chain tool to push out pin at broken link 3. Remove damaged section 4. If shortening chain: Connect remaining sections with chain tool 5. If chain too short: Use spare links to reconnect 6. Ensure chain moves smoothly through drivetrain 7. Test shifting before rejoining group
If unrepairable: Swap to spare bike
Brake Failure – Front brake only failed: Client can continue cautiously using rear brake only (reduce speed) – Rear brake only failed: Client can continue using front brake (more effective anyway) – Both brakes failed or feel unsafe: Swap to spare bike immediately (do not ride)
Minor brake adjustment (rubbing, reduced power): 1. Check brake pads (replace if < 2mm material) 2. Adjust cable tension if mechanical brakes 3. Check hydraulic fluid if hydraulic (should be done pre-tour) 4. True wheel if rubbing due to wheel wobble
Derailleur Problems Chain won’t shift or gears skipping: 1. Check cable tension, adjust barrel adjuster 2. Check derailleur hanger alignment (replace if bent) 3. Check for debris in derailleur 4. If extensive adjustment needed: Swap to spare bike, repair later
Derailleur broken: Swap to spare bike immediately
- Spare Bike Deployment Protocol
When to Deploy Spare Bike: – Mechanical cannot be fixed in <15 minutes – Multiple mechanicals on same bike – Safety concern with continuing on damaged bike – Client preference (avoid ride disruption)
Procedure: 1. Support vehicle pulls ahead of group 2. Unload spare bike, adjust saddle height 3. Client tests brakes and shifting 4. Transfer water bottles and personal items 5. Load broken bike into support vehicle 6. Client rejoins group 7. Broken bike repaired at next long stop or in evening
Documentation: Note which bike was swapped and why (helps identify chronic issues)
6.3 TRAFFIC INCIDENTS
Objective: Manage interactions with vehicles and traffic safety
- Minor Traffic Interaction (No Injury)
Example: Close pass by vehicle, verbal altercation, property damage only
Response: 1. Ensure all riders safe and accounted for 2. Move group off road to safe location 3. Lead guide handles interaction with driver (if present) 4. Remain calm, polite (avoid escalation) 5. Exchange information if property damage: driver’s name, license, insurance; vehicle license plate; contact information 6. Take photos of any damage 7. Call police (113) if driver refuses to provide information or if significant property damage 8. Document in incident report 9. Continue tour once situation resolved
Do not: – Engage in angry confrontation – Accept cash payments without documentation – Admit fault or liability
- Traffic Accident with Injury
Response: 1. Secure scene immediately: Stop all riders, direct traffic around scene 2. Assess injured person(s): Provide first aid as appropriate (see Section 6.1) 3. Call emergency services: 115 (ambulance), 113 (police) 4. Do not move injured person unless immediate danger 5. Gather evidence while waiting: photos of scene (vehicles, positions, damage); witness statements (clients, bystanders); driver information (license, insurance); vehicle license plate 6. Call operations base: “CODE RED” with situation details 7. Cooperate with police: Provide statement, do not admit fault 8. Stay with injured client: Staff accompanies to hospital 9. Document everything: Police report, medical reports, receipts 10. Insurance notification: Operations base contacts insurer immediately
Legal Considerations: – In Vietnam, police must be called for any accident with injury – Do not accept immediate cash settlement (complicates insurance) – Client should not sign anything they don’t understand – Operations base coordinates with insurance company – Legal representation may be necessary for serious incidents
6.4 WEATHER EMERGENCIES
Objective: Protect group from severe weather hazards
- Lightning Storm
Recognition: Dark clouds, thunder, lightning visible, wind picking up
Response: 1. Stop riding immediately at first sign of lightning 2. Seek substantial shelter: building (ideal); hard-top vehicle (support van); dense grove of smaller trees (not single tall tree) 3. Do NOT shelter under: single tall trees (lightning rod); open pavilions; cave entrances 4. If no shelter available: Crouch low in valley or depression, minimize contact with ground 5. Wait 30 minutes after last thunder before resuming 6. If storm prolonged: Load bikes in support vehicle, drive to accommodation
Do not continue riding in active lightning
- Extreme Heat
Prevention (daily in hot conditions): – Start early (6:00 AM departure) – Increase rest stop frequency (every 15 km) – Mandatory hydration (drink before thirsty) – Electrolyte replacement (sports drinks, salt) – Cooling strategies (wet towels on neck, ice water) – Shorten daily distance if necessary
Recognition of Heat Emergency: See Section 6.1B
Group-Level Response: – If multiple people showing heat stress: Stop tour for the day – Move to air-conditioned space – Rest, rehydrate, recover – Resume next day with modified plan (earlier start, shorter distance)
- Heavy Rain / Flooding
Light Rain: – Continue with rain gear – Reduce pace – Increase following distance (wet brakes, reduced visibility) – Avoid painted road markings (slippery when wet) – Avoid metal grates and surfaces
Heavy Rain / Poor Visibility: – Stop and shelter – Wait for rain to lighten – If rain continues >1 hour: Load bikes, transport to accommodation – Do not ride in conditions where visibility <50m
Flooding on Road: – Do not ride through flowing water (risk of unseen hazards, current) – Assess depth: If >ankle deep, find alternative route – Load bikes, detour via support vehicle if necessary – Never attempt to cross flooding that covers the road
6.5 NATURAL DISASTERS & CIVIL UNREST
Objective: Protect group in extraordinary situations
- Earthquake
During Shaking: – Stop riding immediately – Move away from buildings, power lines, trees – Drop to ground if shaking severe – Protect head with arms – Do not attempt to enter buildings during shaking
After Shaking: – Account for all group members – Assess for injuries – Move to open area away from damaged structures – Expect aftershocks (be ready to drop again) – Follow local emergency guidance – Call operations base for evacuation coordination if area damaged
- Civil Unrest / Protests
Avoidance is Best: – Monitor local news for planned demonstrations – Alter route to avoid protest areas – Err on side of caution (wide berth)
If Encountering Protest: 1. Stop at safe distance, do not approach 2. Turn around, take alternative route 3. If surrounded: Stay calm, non-confrontational 4. Follow police instructions 5. Do not take photos or videos (can escalate) 6. Move away from area as soon as safe 7. Contact operations base
- Evacuation Protocols
When Evacuation Necessary: – Natural disaster (earthquake, typhoon, major flooding) – Civil unrest / safety threats – Medical emergency requiring full group transport – Government evacuation orders
Evacuation Steps: 1. Immediate: Account for all clients and staff 2. Communication: Call operations base, inform of situation and location 3. Transportation: Load all clients into support vehicles (bikes left if necessary) 4. Route: Drive to nearest safe zone (hotel, embassy, evacuation center) 5. Ongoing: Follow government / operations base guidance 6. Documentation: Keep all clients together, maintain accountability 7. Coordination: Operations base coordinates onward evacuation if necessary (flights, embassy assistance)
Communication with Clients: – Provide clear, calm information – Explain situation honestly – Outline plan and timeline – Address questions and concerns – Keep spirits up while being realistic
7. QUALITY ASSURANCE & DOCUMENTATION
7.1 DAILY DOCUMENTATION
Objective: Maintain detailed records for quality, safety, and continuous improvement
- Daily Log (Lead Guide Completes)
Required Daily Entries:
Date & Route: – Day of tour (Day 1, Day 2, etc.) – Route ridden (start location to end location) – Actual distance covered – Actual elevation gained – Departure time and arrival time
Clients: – Attendance (all clients present) – Any absences or client taking vehicle transport – General group energy and morale (1-5 scale) – Client feedback or comments overheard
Conditions: – Weather (temperature, precipitation, wind) – Road conditions (dry, wet, dusty, damaged sections noted) – Traffic levels (light, moderate, heavy)
Incidents: – Mechanicals (which bike, what issue, how resolved) – Medical issues (who, what, treatment, outcome) – Near-misses or safety concerns – Route deviations and reason
Highlights: – Cultural experiences or stops – Exceptional moments or client reactions – Photo opportunities or memorable stories
Staff Notes: – Staff performance observations – Communication effectiveness – Equipment functionality – Tomorrow’s preparation needs
Sample Entry:
Day 5 – Hue to Hoi An via Hai Van Pass Distance: 142 km | Elevation: 980m | Time: 8:30 AM – 4:45 PM Weather: Sunny, 28°C, light breeze Group: All 12 clients riding, high energy Highlights: Hai Van Pass summit, Lang Co Beach lunch, group called it the best day so far Incidents: 1 flat tire (Tom, bike #4, resolved in 7 min) Notes: Group requested slower pace on climb – adjusted, everyone summited, celebration at top. Need to tighten brakes on bike #7. Tomorrow: Rest day in Hoi An, optional cooking class
- Incident Report (Completed for Any Incident)
Trigger for Incident Report: – Any medical situation requiring first aid – Any mechanical resulting in spare bike deployment – Any traffic incident (close call or actual collision) – Any client complaint or dissatisfaction – Any weather-related route change – Any emergency services called
Incident Report Form (see Appendix C): – Date, time, location – People involved (names, roles) – Detailed description of incident (what happened) – Immediate actions taken (how responded) – Outcome and resolution – Follow-up required (yes/no, what) – Staff signatures – Witness statements if applicable – Photos if applicable
Distribution: – Original: Filed in tour documentation – Copy: Sent to operations manager within 24 hours – Copy: Attached to client file – Copy: Used for insurance claim if applicable
7.2 CLIENT FEEDBACK COLLECTION
Objective: Continuously improve tour quality through client input
- Mid-Tour Check-In (Day 3-4 of Multi-Day Tours)
Informal Approach: – Lead guide circulates during rest stop or meal – One-on-one brief conversations: “How’s the tour going for you so far?” – Listen for themes: pace, accommodations, food, cultural experiences – Ask open-ended questions: “What’s been your favorite part?” “Anything we could improve?”
Adjustments: – Make real-time adjustments when possible – Acknowledge feedback: “Thanks for letting me know, we’ll…” – Follow up: “How was today after we adjusted the pace?”
- End-of-Tour Survey (Final Day or Post-Tour)
Survey Distribution: – Provide at farewell dinner or via email within 24 hours – Keep survey concise (5-10 minutes to complete) – Mix quantitative (ratings) and qualitative (open-ended)
Key Questions (see Appendix D for full survey):
Quantitative (1-5 scale): – Overall satisfaction with tour – Quality of guiding and staff – Bike equipment quality – Accommodation quality – Food quality and variety – Safety throughout tour – Cultural experiences – Value for money – Likelihood to recommend
Qualitative: – What was the highlight of your tour? – What could we improve? – How would you describe this tour to a friend? – Any staff members you’d like to recognize? – Would you return for another tour with us?
Incentive: Offer small discount on future tour for completing survey
Analysis: – Review all surveys monthly – Identify patterns and trends – Celebrate staff recognition – Create action plans for common complaints – Share results with staff
7.3 CONTINUOUS IMPROVEMENT PROCESS
Objective: Use data and feedback to constantly enhance tour quality
- Monthly Staff Review
Data to Review: – All incident reports from the month – Client survey results and ratings – Mechanical failure patterns – Route condition reports – Staff performance observations
Review Meeting Agenda: 1. Celebrate: What went really well? Staff recognition? 2. Analyze: What patterns do we see in incidents, feedback, mechanicals? 3. Problem-Solve: For recurring issues, what’s the root cause? How do we fix it? 4. Action Plan: Specific improvements, who’s responsible, timeline 5. Follow-Up: Review last month’s action items, did we improve?
Example Improvement Cycle: – Pattern Identified: Multiple clients mentioned afternoon fatigue at the same point – Root Cause: Rest stop just before steep climb, timing poor – Solution: Move rest stop to after climb (downhill side) – Implementation: Update route cards, brief staff – Result: Monitor feedback, confirm improvement
- Equipment Lifecycle Management
Bike Maintenance Schedule: – Daily: Visual inspection, tire pressure, chain lubrication – Weekly: Deep clean, brake check, gear adjustment – Monthly: Full tune-up (cables, bearings, wheels trued) – Annually: Complete overhaul, replace worn components
Replacement Criteria: – Bikes: After 5 years or 50,000 km – Tires: At 40% tread wear or visible damage – Brake pads: At 2mm material remaining – Chains: At 0.75% stretch (measured with chain checker) – Cables: Annually or when frayed – Helmets: After any impact or every 5 years
Fleet Rotation: – Retire oldest bikes first – Track each bike’s usage (km, tours, incidents) – Plan replacements proactively (budget annually) – Donate retired bikes to local communities (goodwill, social benefit)
- Staff Training & Development
Annual Requirements: – First aid certification renewal (as needed) – Vietnamese culture and history refresher (4 hours) – Customer service training (4 hours) – New route reconnaissance (2 days per new route) – Mechanical skills workshop (8 hours)
Ongoing Development: – Shadow experienced guides (new guides) – Receive client feedback (positive and constructive) – Attend industry conferences or webinars – Cross-train on different routes – Develop specialty skills (photography, cooking, history)
Performance Reviews: – Quarterly one-on-one with operations manager – Review client feedback specific to that guide – Discuss goals and challenges – Create development plan – Recognize excellent performance (bonuses, public recognition)
8. APPENDICES
APPENDIX A: CLIENT EQUIPMENT CHECKLIST
Pre-Tour Send to Clients
Essential Cycling Gear: – Helmet (bring your own or we provide) – Padded cycling shorts or bibs (2-3 pairs) – Moisture-wicking cycling jerseys (3-4) – Cycling gloves (padded, full or half finger) – Cycling shoes (if using clipless pedals, or we provide flat pedals) – Sunglasses (UV protection, impact resistant) – Sunscreen (SPF 30+, sweat-resistant) – Lip balm with SPF – Water bottles (2, we provide bike bottle cages)
Clothing: – Casual clothing for evenings (modest, respectful) – Light jacket or windbreaker – Rain jacket (lightweight, packable) – Comfortable walking shoes – Sandals or flip-flops (for evening, hotel) – Swimsuit (hotels often have pools) – Hat or cap for sun protection – Buff or bandana (dust, sun protection)
Personal Items: – Passport (valid 6+ months) – Visa (if required, see our guide) – Travel insurance documents (mandatory) – Credit/debit cards (Visa/Mastercard widely accepted) – Cash (USD or Vietnamese Dong) – Mobile phone and charger – Camera (optional, phone cameras often sufficient) – Prescription medications (in original containers) – Basic first aid (band-aids, pain relievers, anti-diarrheal) – Toiletries (shampoo, soap, toothbrush, etc.) – Insect repellent (DEET-based for tropical areas) – Hand sanitizer
Optional but Recommended: – E-reader or book – Journal for notes – Portable phone charger (power bank) – Small daypack (for carrying personal items while riding) – Chamois cream (prevent saddle sores) – Electrolyte tablets or powder
What We Provide: – Bicycle (road or hybrid, your choice) – Helmet (if you don’t bring your own) – Support vehicle with water and snacks – First aid and mechanical support – Accommodations and most meals
What NOT to Bring: – Expensive jewelry – Large amounts of cash – Illegal substances – Excessive luggage (one bag/suitcase recommended)
APPENDIX B: BIKE INSPECTION CHECKLIST
Complete Before Every Tour
Bike ID Number: _______ Assigned to: ________________ Date: _______
Frame & Fork: – No cracks, dents, or structural damage – Paint condition acceptable – Fork legs straight, no damage – Headset tight, no play
Wheels: – Rims true (no wobble) – Spokes tight, none broken – Hubs spin freely, no grinding – Tires: Tread >40%, no cuts or bulges – Tire pressure: Front _____ psi, Rear _____ psi (recommended: 80-100 psi) – Quick releases tight
Brakes: – Front brake: Stops wheel firmly – Rear brake: Stops wheel firmly – Brake pads: >2mm material remaining – Cables: No fraying – Hydraulic lines: No leaks (if applicable) – Levers: Firm feel, not spongy
Drivetrain: – Chain: Clean, lubricated, <0.75% stretch – Cassette/freewheel: Teeth not worn – Chainrings: Teeth not worn – Front derailleur: Shifts smoothly through all gears – Rear derailleur: Shifts smoothly through all gears – Cables: No fraying – Derailleur hanger: Straight
Cockpit: – Handlebars: Straight, no cracks – Stem: Tight, aligned – Grips/bar tape: Secure, good condition – Brake levers: Secure, proper angle – Shifters: Secure, function properly
Saddle & Seatpost: – Saddle: Secure, no damage – Seatpost: Proper insertion depth (minimum line not visible) – Quick release or bolt: Tight
Accessories: – Bottle cages: Secure (2) – Bell/horn: Functions – Lights: Front (white) and rear (red) – charged/batteries fresh – Reflectors: Present and secure – Bike number tag: Attached
Test Ride (5 minutes): – Smooth pedaling, no noise – Shifts through all gears correctly – Brakes stop bike safely – No unusual sounds or vibrations
Inspector Name: ________________ Signature: ________________
Result: ☐ PASS – Ready for tour ☐ FAIL – Repairs needed (specify below)
Repairs Needed: _______________________________________________ Repairs Completed By: ________________ Date: _______
APPENDIX C: INCIDENT REPORT FORM
Complete for Any Safety Incident
Incident ID: _______ (Office Use) Date: _______ Time: _______ Location: __________________ Tour Name: _________________ Tour Day: _____ of _____ Weather Conditions: ☐ Clear ☐ Rainy ☐ Windy ☐ Hot ☐ Other: ______
Type of Incident: (Check all that apply) ☐ Medical (injury/illness) ☐ Mechanical (bike failure) ☐ Traffic (vehicle interaction) ☐ Fall (no vehicle involved) ☐ Other: ____________
PEOPLE INVOLVED:
Client(s): Name: __________________ Age: ___ Bike #: Name: _______________ Age: ___ Bike #: ___
Staff Present: Name: __________________ Role: _______________ Name: __________________ Role: _______________
Witnesses: Name: __________________ Contact: _______________ Name: __________________ Contact: _______________
INCIDENT DESCRIPTION (What happened? Be specific and factual):
IMMEDIATE ACTIONS TAKEN (First aid? Mechanical fix? Called 115? etc.):
OUTCOME: ☐ Client continued tour normally ☐ Client took vehicle transport (remainder of day / # of days: ) ☐ Client transported to hospital/clinic ☐ Client evacuated / tour ended ☐ Equipment repaired/replaced ☐ Other: _________________
MEDICAL INFORMATION (If applicable): Injury/Illness Type: ___________________________________________ Body Part(s) Affected: _________________________________________ First Aid Provided: ___________________________________________ Medical Facility: Name: __________________ Phone: ______________ Medical Staff Seen: Dr./Nurse: ____________________ Treatment Received: ___________________________________________ Medications Given: ____________________________________________ Follow-Up Required: ☐ Yes ☐ No If yes, specify: __________________________________________________
EQUIPMENT INFORMATION (If applicable): Bike ID: _____ Component Failed: _______________________ Failure Mode (how did it break?): ______________________________ Repairs Made: _________________________________________________ Replacement Parts Used: ________________________________________ Bike Status: ☐ Returned to service ☐ Retired from fleet
CONTRIBUTING FACTORS (What led to this incident?): ☐ User error ☐ Equipment failure ☐ Road conditions ☐ Weather ☐ Traffic ☐ Inadequate briefing/training ☐ Other: ____________
Could This Have Been Prevented? ☐ Yes ☐ No If yes, how?: ____________________________________________________
FOLLOW-UP ACTIONS: ☐ Insurance claim filed (Claim #: ______) ☐ Client emergency contact notified ☐ Operations manager notified ☐ Equipment repaired or retired ☐ Staff re-training needed ☐ Route modification needed ☐ Other: ___________________
PHOTOS/DOCUMENTATION ATTACHED: ☐ Yes ☐ No If yes, number of photos: _____
Report Completed By: _____________________ Role: _________ Signature: _______________________ Date: _______
Reviewed By (Operations Manager): ____________ Date: _______
APPENDIX D: CLIENT SATISFACTION SURVEY
[Tour Name] – Post-Tour Feedback
Thank you for choosing our tour! Your feedback helps us continuously improve. Please take 5-10 minutes to complete this survey.
Your Information (Optional): Name: _____________________ Email: _____________________ Date of Tour: _______________ to _______________
SECTION 1: RATE YOUR EXPERIENCE (1 = Poor, 5 = Excellent)
Aspect | 1 | 2 | 3 | 4 | 5 |
Overall tour satisfaction | ☐ | ☐ | ☐ | ☐ | ☐ |
Tour guide(s) knowledge and professionalism | ☐ | ☐ | ☐ | ☐ | ☐ |
Tour guide(s) friendliness and communication | ☐ | ☐ | ☐ | ☐ | ☐ |
Support staff (drivers, mechanics) | ☐ | ☐ | ☐ | ☐ | ☐ |
Bicycle quality and condition | ☐ | ☐ | ☐ | ☐ | ☐ |
Route selection and daily distances | ☐ | ☐ | ☐ | ☐ | ☐ |
Accommodation quality | ☐ | ☐ | ☐ | ☐ | ☐ |
Food quality and variety | ☐ | ☐ | ☐ | ☐ | ☐ |
Cultural experiences and local interactions | ☐ | ☐ | ☐ | ☐ | ☐ |
Safety throughout tour | ☐ | ☐ | ☐ | ☐ | ☐ |
Value for money | ☐ | ☐ | ☐ | ☐ | ☐ |
Pre-tour communication and preparation | ☐ | ☐ | ☐ | ☐ | ☐ |
SECTION 2: OPEN-ENDED QUESTIONS
- What was the highlight of your tour? (Most memorable moment or experience)
- What could we improve? (Be specific please!)
- Was the difficulty level appropriate for you? ☐ Too easy ☐ Just right ☐ Too difficult Comments: _______________________________________________________
- Did you feel safe throughout the tour? ☐ Always ☐ Mostly ☐ Sometimes ☐ Rarely If not always, please explain: ____________________________________
- Any staff members you’d like to recognize for exceptional service?
- How would you describe this tour to a friend in one sentence?
- How likely are you to recommend this tour to a friend? ☐ Very likely (10) ☐ Likely (8-9) ☐ Neutral (6-7) ☐ Unlikely (4-5) ☐ Very unlikely (1-3)
- Would you be interested in another tour with us? ☐ Yes, absolutely ☐ Maybe ☐ No If yes, which destination interests you? ___________________________
- Any other comments, suggestions, or stories to share?
Thank you for your feedback! As a token of our appreciation, here’s a 10% discount code for your next tour: ___________
Please return this survey to your guide or email to: feedback@[company].com
APPENDIX E: EMERGENCY CONTACT CARD
(Laminated card carried by all staff)
VIETNAM CYCLING TOURS – EMERGENCY CONTACTS
Tour: ________________ Dates: _______________
EMERGENCY SERVICES (VIETNAM): Ambulance: 115 Police: 113 Fire: 114
COMPANY EMERGENCY LINE (24/7): Operations Manager: _______________ (+84 ___________)
STAFF ON THIS TOUR: Lead Guide: _______________ (+84 ___________) Sweep Guide: _______________ (+84 ___________) Driver: _______________ (+84 ___________)
NEAREST HOSPITALS (Day [X] of Tour): Primary: _______________ Address: _____________________ Phone: ________ GPS: ________
Secondary: _______________ Address: _____________________ Phone: ________ GPS: ________
EMBASSY CONTACTS: US Embassy Hanoi: +84 24 3850 5000 US Consulate HCMC: +84 28 3520 4200 Canadian Embassy Hanoi: +84 24 3734 5000 UK Embassy Hanoi: +84 24 3936 0500 Australian Embassy Hanoi: +84 24 3774 0100
INSURANCE EMERGENCY ASSISTANCE: [Space to write client’s insurance emergency numbers during tour] Client: __________ Insurance: __________ #: __________
IF EMERGENCY: 1. Assess & provide first aid 2. Call 115 if serious 3. Call Operations Manager 4. Document everything
APPENDIX F: VIETNAMESE KEY PHRASES FOR GUIDES
Essential Communication
Greetings: – Hello: Xin chào (sin chow) – Thank you: Cảm ơn (gahm un) – Yes: Vâng (vung) – No: Không (khohm)
Emergency: – Help!: Cứu tôi! (koo-oo toy) – Emergency!: Khẩn cấp! (kan kup) – Call ambulance: Gọi xe cứu thương (goy se koo-oo tuung) – Hospital: Bệnh viện (ben vee-en) – Doctor: Bác sĩ (bahk see) – Police: Cảnh sát (gahn saht)
Medical: – Injured: Bị thương (bee tuung) – Pain: Đau (dow) – Accident: Tai nạn (tai nahn) – Medicine: Thuốc (took) – Where is hospital?: Bệnh viện ở đâu? (ben vee-en uh doh)
Cycling-Related: – Bicycle: Xe đạp (se dahp) – Repair: Sửa chữa (soo-a choo-a) – Flat tire: Lốp xe bị xì (lop se bee see) – Water: Nước (nook) – Toilet: Nhà vệ sinh (nyah vay sin)
Directions: – Left: Trái (chai) – Right: Phải (fai) – Straight: Thẳng (tang) – Stop: Dừng lại (doong lai)
Common Phrases: – How much?: Bao nhiêu? (bow nyew) – Too expensive: Đắt quá (dat quah) – Where is…?: …ở đâu? (uh doh) – I don’t understand: Tôi không hiểu (toy khohm hyew)
